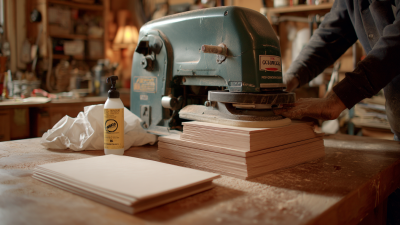
How to Choose the Right Hand Sanding Pads for Your DIY Projects
In the world of DIY projects, selecting the right hand sanding pads is essential for achieving a smooth and professional finish. According to a report by the American Institute of Architects, nearly 60% of homeowners engage in DIY renovations each year, highlighting the growing importance of quality tools in these endeavors. Hand sanding pads come in various materials and grit sizes, each tailored to specific tasks, from finer detailing to heavy-duty sanding.
With a significant increase in home improvement projects, market research indicates that the hand sanding pad segment is expected to grow by 5.6% annually through 2025. Understanding the types and applications of hand sanding pads can lead to more efficient work and superior results, making them a crucial consideration for any DIY enthusiast.
Understanding Different Types of Hand Sanding Pads for Various Materials
 When selecting hand sanding pads for your DIY projects, it's essential to understand the different types available, as each is suited for various materials. For instance, foam sanding pads are excellent for contours and curves, providing flexibility that allows you to reach intricate areas. They are particularly effective on curved wood surfaces and are less prone to causing scratches. Conversely, disc-style sanders made of paper or cloth are ideal for flat surfaces, such as tabletops or cabinets, delivering smooth finishes with consistent abrasiveness.
Another key consideration is the grit levels of sanding pads. Coarse grits, usually between 40 to 60, are perfect for heavy material removal, while medium grits around 80 to 120 are effective for smoothing surfaces. For finishing touches, fine grits ranging from 180 to 220 provide a polished look, essential for final stages of projects. Understanding these types and grit levels not only enhances your efficiency but also ensures the best results tailored to the materials you are working with.
Evaluating Grit Levels to Achieve Desired Finish on Your DIY Project
When selecting hand sanding pads for your DIY projects, the grit level of the pads plays a crucial role in achieving the desired finish. Grit levels are classified from coarse (low numbers) to fine (high numbers), affecting the texture and smoothness of the surface you are working on. According to a report by the Abrasive Engineering Society, choosing the correct grit can reduce finishing time by up to 30%, making it vital for efficiency in home improvement tasks.
For instance, starting with a
coarse grit pad, such as 60 or 80, is effective for removing old paint or smoothing out rough surfaces. As the project progresses, transitioning to
medium grits (120 to 180) allows for refining edges and achieving a smoother base. Finally, using
fine grits (220 and above) will help to polish the surface, providing a
professional finish. Research indicates that
70% of DIY enthusiasts overlook the importance of grit transitions, leading to unsatisfactory results. Paying attention to these details will not only enhance the overall quality of your work but also save time and resources.
Choosing Between Foam, Paper, and Cloth Sanding Pads for Effective Use
When selecting the right sanding pads for your DIY projects, understanding the differences between foam, paper, and cloth pads is crucial for achieving effective results. Foam sanding pads are ideal for curved or irregular surfaces due to their flexibility. They provide a smooth finish and are particularly useful for sanding finishes on wood without scratching the underlying material. Additionally, foam pads often come in various grits, making them versatile for different levels of sanding tasks.
On the other hand, paper sanding pads are a traditional choice favored for their durability and effectiveness in removing material quickly. They typically feature an abrasive coating and are suitable for flat surfaces. However, they can wear out faster when used on very rough surfaces. Cloth sanding pads, while less common, are robust and can last longer than paper pads. They are ideal for heavy sanding applications and can resist tearing, making them perfect for tasks that require more aggressive abrasion. Choosing the right material based on your project's requirements will ensure an efficient and satisfactory outcome.
How to Choose the Right Hand Sanding Pads for Your DIY Projects
| Type of Sanding Pad |
Material |
Grit Range |
Best For |
Durability |
| Foam Sanding Pads |
Foam |
120 - 400 |
Curved surfaces and detail work |
Medium |
| Paper Sanding Pads |
Paper |
60 - 800 |
General purpose sanding |
Low to Medium |
| Cloth Sanding Pads |
Cloth |
80 - 600 |
Heavy-duty sanding |
High |
Assessing Durability and Longevity of Hand Sanding Pads for Frequent Projects
When selecting hand sanding pads for DIY projects, durability and longevity are crucial factors to consider. The right sanding pads not only enhance the efficiency of the sanding process but also provide a better finish on the surface. According to industry reports, high-quality sanding pads can last up to 30% longer than their lower-quality counterparts, making them a wise investment for frequent projects. This longevity is particularly important for woodworkers who often engage in multiple sanding tasks and require consistent results without frequent pad replacements.
Furthermore, the choice of materials in sanding pads plays a key role in their durability. For instance, pads made from aluminum oxide are known for their resilience and resistance to wear, while those infused with ceramic grit can offer even better performance for heavy sanding tasks. Studies suggest that users who opt for premium materials can increase their project efficiency by as much as 25%, as they spend less time changing pads and more time on actual woodworking. Therefore, assessing the material composition and projected lifespan of sanding pads is essential for achieving outstanding results in DIY endeavors.
Durability and Longevity of Hand Sanding Pads
Tips for Proper Technique in Using Hand Sanding Pads for Optimal Results
When tackling DIY projects, choosing the right hand sanding pads is critical to achieving a smooth finish. Hand sanding requires not only the appropriate materials but also the right technique. To start, consider the grit of the sanding pad. Coarser grits (like 60 or 80) are ideal for removing rough surfaces, while finer grits (120 and above) are suited for finishing touches. Selecting the correct grit ensures you don’t damage the material you are working on and leads to optimal results.
Tips for Proper Technique in Using Hand Sanding Pads for Optimal Results: First, always ensure that you sand in the direction of the wood grain. This avoids visible scratches and enhances the natural look of the wood. Applying even pressure is also crucial; too much force can create uneven surfaces or gouges. It’s beneficial to regularly check your progress by feeling the surface, ensuring it’s getting smooth as you work. Additionally, using a backer pad can help distribute your pressure more evenly, making your sanding more effective and consistent. Remember, patience is key, and taking the time to do it right will pay off in the finished project.