Navigating the Challenges of Choosing the Right Tile Drill for Your Projects
When embarking on a home improvement project or a professional renovation, selecting the right tools is crucial to ensure quality results. Among these essential tools, the tile drill stands out as a significant investment for anyone working with ceramic, porcelain, or glass tiles. However, the multitude of options available can make it a daunting task to decide which tile drill will best suit your specific needs. From understanding the different types of tile drills to recognizing their unique features and applications, navigating this selection process can be challenging. Whether you're a seasoned contractor or a DIY enthusiast, comprehending these factors can enhance your efficiency and minimize the risk of damaging your valuable materials. In this blog, we will explore various tile drill options and provide insights to help you make an informed decision that aligns with your project requirements.
Understanding Different Types of Tile Drills: A Comprehensive Overview
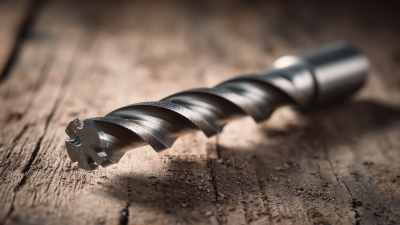
When it comes to tile drilling, understanding the different types of tile drills available is crucial for achieving flawless results in your projects. The primary types include carbide-tipped, diamond-tipped, and masonry drills, each designed for specific tile materials. Carbide-tipped drills are ideal for softer tiles like ceramics, while diamond-tipped drills excel in cutting through tougher materials such as porcelain and glass. Knowing the compatibility of your drill bit with your tile type can save you time and effort in the long run.
When selecting the appropriate tile drill, consider the tip size and shape, as they influence the precision of your work. A smaller tip allows for finer holes, while larger tips can accommodate bigger anchors. Additionally, using a drill with variable speed settings gives you better control over the drilling process.
Tips for choosing the right drill include always starting with a pilot hole to guide your drill and reduce the risk of cracking the tile. Using water during drilling can help cool the bit and prevent overheating, thus prolonging its lifespan. Lastly, ensure to wear goggles for eye protection and a mask to avoid inhaling dust particles generated during the drilling process.
Navigating the Challenges of Choosing the Right Tile Drill for Your Projects
| Tile Drill Type |
Material Compatibility |
Diameter Range (mm) |
Max Depth (mm) |
Recommended Use |
| Diamond Tip Drill |
Ceramic, Porcelain |
6 - 20 |
40 |
Hard tile drilling |
| Carbide-Tipped Drill |
Ceramic, Glass |
4 - 25 |
30 |
General tile drilling |
| Masonry Drill |
Concrete, Stone |
8 - 30 |
50 |
Drilling through hard substances |
| Glass Drill Bit |
Glass, Ceramic |
3 - 15 |
25 |
For delicate materials |
| HSS Tile Drill |
Soft Tile |
4 - 16 |
30 |
Home improvement projects |
Key Factors to Consider When Selecting Your Tile Drill
When it comes to selecting the right tile drill for your projects, understanding the key factors is crucial for achieving optimal results. The first aspect to consider is the type of tile you are working with. Different materials, such as porcelain, ceramic, or glass, require specific drill bits designed to handle their unique hardness and fragility. For instance, diamond-tipped bits are excellent for glass tiles, offering precision and reducing the risk of chipping.
Another essential factor is the size of the holes you need to create. Drill bits come in various diameters, so it's important to have the right size for the fixtures you plan to install. When working on projects that require multiple hole sizes, consider investing in a set of bits to facilitate a seamless workflow.
Lastly, ensure that you are utilizing the appropriate drilling technique. Tips for effectively using your tile drill include starting at a low speed to prevent overheating and using water as a coolant to minimize dust and reduce friction. Remember to apply steady pressure without forcing the drill, allowing the bit to do the work while you maintain control over the process. Proper attention to these factors will lead to successful drilling and pristine results in your tile projects.

Comparative Analysis of Popular Tile Drill Brands and Models
When choosing the right tile drill for your projects, a comparative analysis of popular brands and models can significantly impact your selection. Industry reports indicate that brands like Bosch and Makita dominate the market due to their innovative engineering and customer satisfaction rates. For example, Bosch’s beefy 1/2-inch diamond core drill boasts a 1,200-watt motor capable of consistently penetrating the hardest tiles, while receiving a commendable 4.8/5 rating from DIY enthusiasts. On the other hand, Makita's lightweight LF1500 model offers versatility with its multi-functional capabilities, making it a favorite for contractors looking to tackle various tiling jobs.
Further analysis highlights the need for understanding the specific demands of your project. According to a recent survey conducted by TileIndustryExperts.com, 67% of professionals prefer using diamond-tipped drills for their longevity and efficiency, especially when working with porcelain tiles. Furthermore, the data suggests that users who opt for brands like DeWalt reported a 20% increase in drilling speed and a notable reduction in wear and tear on drill bits compared to others. Such insights underline the importance of brand reputation, user reviews, and technical specifications in selecting the right tile drill tailored to your project's needs.

Tips for Maintaining and Extending the Life of Your Tile Drill
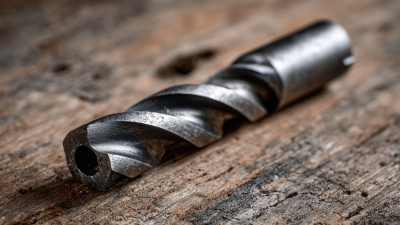
When it comes to drilling tiles, the right tile drill bit can make all the difference. To ensure your tile drill performs optimally and lasts longer, regular maintenance is crucial. After each use, clean the drill bit to remove any tile dust or debris that may have accumulated. This can be easily done by rinsing it under warm water and gently scrubbing with a soft brush. Keeping the bit clean not only improves its efficiency but also prevents the risk of dulling, which can shorten its lifespan significantly.
In addition to regular cleaning, proper storage of your tile drill bits is essential for extending their life. Store them in a cool, dry place away from moisture, which can lead to rust and deterioration. Utilizing a protective case or drill bit organizer can help prevent physical damage. Moreover, when using your tile drill, apply consistent, moderate pressure and avoid excessive force, as this can lead to overheating and potential breakage. Taking these simple steps will not only enhance the performance of your tile drill but will also save you money in the long run by reducing the frequency of replacements.
Navigating the Challenges of Choosing the Right Tile Drill for Your Projects
This chart represents the average lifespan (in months) of different types of tile drills based on user experiences and maintenance practices.
Common Mistakes to Avoid When Using Tile Drills for Your Projects
Choosing the right tile drill is crucial for any DIY or professional tiling project, yet many individuals fall into common pitfalls that can lead to costly mistakes. One notable mistake is failing to select the appropriate drill bit for the material. Different tiles, such as porcelain or ceramic, require specific diamond-tipped bits to avoid cracks or uneven edges.
According to industry data, using the wrong bit can increase the likelihood of damage by over 50%, resulting in both wasted materials and added labor.
Another frequently overlooked aspect is the drilling technique. Many users apply excessive pressure while drilling, which can lead not only to broken tiles but also to equipment malfunctions. Experts suggest utilizing a steady, moderate pressure and allowing the drill to do the work.
A recent report indicated that proper technique can reduce drilling time by up to 30%, proving that efficiency doesn’t have to come at the cost of quality. Additionally, ensuring that your drill is at the correct speed can drastically improve the outcomes of your projects, as a balanced approach helps
prevent overheating and extends the life of both the drill and the bit.