Choosing the right Hand Sanding Pads can change the quality, speed, and comfort of a finishing job. The best option depends on your surface, abrasive grit, pad shape, and working pressure. A pad that feels excellent on painted wood may perform poorly on metal or curved plastic. I have learned this through repeated workshop trials, including a few avoidable mistakes.
Small details matter. Dense foam supports even pressure on flat panels. Flexible pads follow rounded edges without leaving harsh scratches. A coarse abrasive removes old coatings quickly, while a finer grit prepares surfaces for paint or polish. Do not judge quality by appearance alone. Check the abrasive material, backing strength, grip design, and manufacturer guidance. Reliable brands usually provide clearer grit information and realistic usage recommendations.
Your hand also provides useful feedback. If the pad slips, folds, or heats quickly, the choice may be wrong. However, user technique affects results too. Excessive pressure can clog the abrasive and create uneven marks. I sometimes blame the pad too soon. That is worth reconsidering.
This guide explains how to compare Hand Sanding Pads for different materials and tasks. It considers durability, ergonomics, surface control, and value. You will also see why one universal pad rarely solves every sanding problem. Test a small, hidden area first. Clean the surface between grits. These simple habits protect your finish and produce more dependable results.
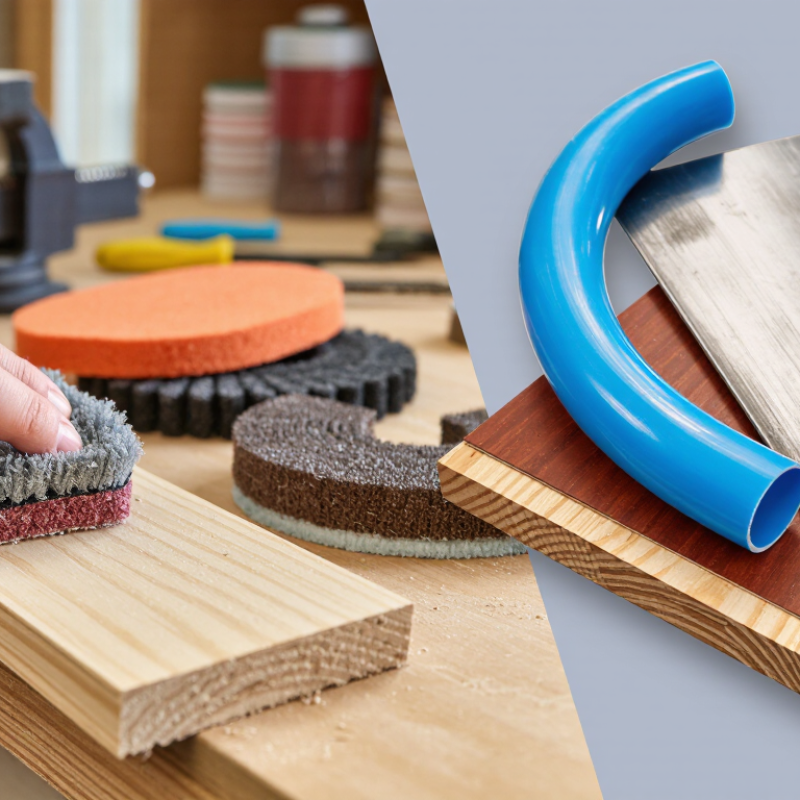
Hand sanding pads are designed for controlled surface preparation, not just removing scratches. A foam-backed pad follows curved edges and spreads pressure evenly on painted wood or plastic. A firm abrasive pad works better on flat surfaces, where leveling matters. Nonwoven pads are useful for scuffing, cleaning, and creating a consistent key before coating. Their flexible fibers reach shallow grooves without cutting too aggressively.
Grit selection depends on the surface and the desired finish. Coarse pads remove old finishes quickly, but they can leave deep marks. Medium grits help shape edges and smooth visible defects. Fine pads prepare a surface for paint or polish. Diamond hand pads suit hard materials such as glass, stone, and ceramic, although they require patience and light pressure. In practical use, I have found that water can reduce dust on suitable materials, but it may damage moisture-sensitive surfaces. Always check the material first.
Tips: Match the pad to the surface, then test it in a hidden area. Keep the pad flat when possible. Use short, even strokes and inspect the surface often. Replace clogged or uneven pads. I once trusted a worn pad for too long, and the finish became patchy. That mistake reminded me that pad condition affects results as much as grit. A comfortable grip also matters, especially during detailed work. Small differences become obvious.
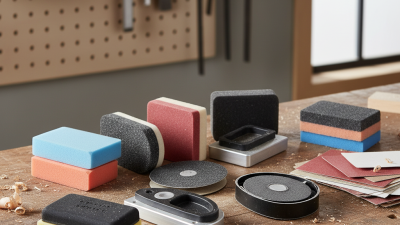
Choosing the best hand sanding pad starts with the surface, not the tool. A soft, foam-backed pad follows curves and reduces pressure marks on painted wood. A firmer pad keeps edges flatter on metal or filler. Match abrasive coarseness to the material’s condition. Coarse grit removes scratches quickly, but it can create deeper ones. Fine grit smooths a surface, yet it will not repair uneven damage. I learned this after rushing a cabinet door. The finish looked smooth from a distance. Close up, old sanding lines remained.
For bare wood, begin with moderate abrasion and follow the grain. Use lighter pressure near corners, where edges disappear quickly. On cured filler, a firmer pad can level high spots without digging aggressively. Painted surfaces need caution, especially when the coating is thin or old. Test a small hidden area first.
Experienced finishers also check the pad’s cutting consistency during work. It should shed dust reasonably and feel stable in your hand. Replace it when the abrasive feels glazed or the backing loses shape. There is no perfect grit choice. Surface hardness, finish thickness, and hand pressure change the result.
Tips: Keep a sample board for testing. Sand three short strokes, then wipe away dust and inspect under angled light. If the pad skips, reduce pressure or choose softer backing. If scratches remain, step down gradually instead of jumping to coarse abrasive. Not every surface agrees. Clean the pad often, but do not assume cleaning restores worn grit.
Choosing the right hand sanding pad begins with material. Foam-backed pads flex around curved cabinet edges and reduce pressure marks. Nonwoven pads suit light scuffing, paint preparation, and delicate finishes. Abrasive paper-backed pads cut faster on flat wood, filler, and metal. According to Grand View Research’s 2024 abrasives market report, the global abrasives market was valued at over USD 50 billion in 2023. That scale reflects varied applications, not one universal pad. My practical mistake was using a hard pad on a rounded edge. It left a visible flat spot.
Shape controls contact. A rectangular pad works well on tabletops and door faces. A narrow block reaches corners, rails, and recessed profiles. For detail work, a triangular or contoured pad improves control. Size matters too. A larger pad distributes pressure, while a smaller pad concentrates cutting action. Choose a pad that fits your palm without forcing your wrist sideways. The wrong size becomes tiring quickly. Ergonomic research from the U.S. National Institute for Occupational Safety and Health links awkward wrist postures with higher musculoskeletal risk, so comfort is a technical factor.
Tips: Match the pad to the surface, not only the grit. Test on scrap first. Use light, even strokes. Replace clogged abrasive early. Sanding dust also deserves attention; OSHA’s respirable crystalline silica limit is 50 micrograms per cubic meter over eight hours. Wear suitable respiratory protection and improve ventilation, especially when sanding masonry or engineered materials. I still reassess pad choice after the first few strokes. The surface often tells the truth.
How to Choose the Best Hand Sanding Pads for Your Needs?
Evaluating Comfort, Durability, and Reusability
A sanding pad should feel steady after several minutes of work. In my workshop, soft foam reduces pressure on fingertips and helps prevent uneven sanding marks. A pad with rounded edges also feels better around curved chair legs and narrow trim. Check the grip surface before buying. If it slips when your palm becomes warm, control quickly becomes tiring.
Durability depends on the abrasive coating, backing material, and the surface being sanded. I look for even grit distribution and firm edges that do not crumble during repeated strokes. Coarse pads usually wear faster on rough timber, while fine pads can last longer on painted surfaces. Still, this is not a fixed rule. Dust, pressure, and moisture change the result.
Reusability deserves practical testing. After use, I tap the pad gently and brush away loose dust. Some pads can be rinsed, but they must dry completely before storage. A damp pad may soften, smell, or lose its shape. I once kept using a visibly clogged pad, expecting it to save time. It did not. The finish became patchy, and the next sanding stage took longer. Inspect the abrasive surface under good light. Replace the pad when smooth spots appear or hand pressure increases noticeably.
| Pad Type | Typical Abrasive Material | Common Grit Range | Comfort Rating | Durability Rating | Reusability | Best For |
|---|---|---|---|---|---|---|
| Foam-Backed Sanding Pad | Aluminum oxide or silicon carbide bonded to flexible foam | 80–220 grit | ★★★★★ | ★★★☆☆ | Limited; rinse gently if the abrasive surface permits | Curved surfaces, light wood shaping, and reduced hand fatigue |
| Nonwoven Abrasive Pad | Aluminum oxide or silicon carbide fibers in a synthetic web | Approximately 80–800 grit equivalent | ★★★★★ | ★★★★☆ | Good; many can be brushed or rinsed and air-dried | Scuffing, blending, cleaning, and preparing painted or metal surfaces |
| Mesh Sanding Pad | Ceramic or aluminum oxide abrasive on an open mesh backing | 80–320 grit | ★★★★☆ | ★★★★★ | Very good; open mesh helps remove dust and supports rinsing | Drywall, filler, wood, and applications where clog resistance matters |
| Flexible Film Pad | Aluminum oxide or ceramic abrasive on a thin polymer film | 120–1,000 grit | ★★★★☆ | ★★★★☆ | Moderate; wipe clean and store flat to prevent creasing | Fine finishing, detail work, and consistent scratch patterns |
| Hand Sanding Sponge | Aluminum oxide abrasive on a compressible foam block | 60–220 grit | ★★★★☆ | ★★★☆☆ | Good; washable versions can be rinsed and reused after drying | Edges, profiles, trim, and small woodworking projects |
| Diamond Hand Pad | Industrial diamond particles on a flexible backing | Approximately 60–1,200 grit equivalent | ★★★☆☆ | ★★★★★ | Excellent; rinse with clean water and dry thoroughly | Glass, stone, ceramics, composites, and hard finishing tasks |
| Silicon Carbide Wet-and-Dry Sheet Pad | Silicon carbide abrasive on waterproof paper or film | 80–2,000 grit | ★★★☆☆ | ★★★★☆ | Good for wet use; replace when the abrasive becomes smooth or torn | Automotive finishing, plastics, paint, and high-grit wet sanding |
| Steel Wool-Style Abrasive Pad | Metal fibers or synthetic abrasive fibers | Very fine to coarse grades rather than standard grit only | ★★★★☆ | ★★★☆☆ | Limited; metal versions should be kept dry to reduce rust risk | Polishing, denibbing, surface dulling, and removing light residue |
Selection guide: Choose foam-backed or sponge pads for comfort and flexibility, mesh pads for dust control and longer service life, nonwoven pads for cleaning and blending, and diamond or silicon carbide pads for hard materials and fine finishing. Abrasive performance varies with the backing, pressure, material being sanded, and whether the pad is used wet or dry.
Choosing the best hand sanding pad starts with the surface, not the package. Use a firm pad for flat wood and a flexible pad for curved edges. Match the abrasive grit to the task. Coarse grits remove material quickly, while fine grits reduce visible scratches. A comfortable grip also matters, because excessive pressure can increase hand fatigue and uneven sanding.
Safety needs more attention than most workshop guides admit. Sanding materials containing crystalline silica can create hazardous dust. OSHA’s respirable silica standard sets an action level of 25 micrograms per cubic meter and a permissible exposure limit of 50 micrograms over eight hours. Use local extraction, suitable eye protection, and a properly fitted respirator when risk assessments require it. Never blow dust from clothing with compressed air. Clean it carefully instead. The UK Health and Safety Executive also identifies wood dust as a workplace hazard in EH40 exposure-limit guidance.
Inspect the pad before every session. Replace torn, glazed, loose, or heavily worn abrasive surfaces. A damaged pad may slip and force your wrist into an awkward angle. Keep the abrasive face clean, and store pads flat in a dry cabinet. Some wet-sanding pads require controlled water use and complete drying afterward; ordinary pads may break down when soaked. I sometimes press harder when the finish resists. That is usually the wrong response. Slow strokes, light pressure, and short breaks work better. NIOSH recommends reducing force and awkward wrist postures to help control ergonomic risk.
Choose the abrasive grit according to the material and the amount of material you need to remove. Lower grits cut faster, while higher grits create a smoother finish.
Safety and maintenance: Use light, even pressure, wear eye and respiratory protection, and keep the sanding surface clean. Replace a pad when its abrasive surface is clogged, worn, torn, or no longer cuts evenly.
Particle sizes shown are approximate nominal FEPA P-grade values in micrometres (µm). Actual particle-size ranges vary by standard and manufacturer.